Peanut Butter Fudge

Posted by Mandy on December 22nd, 2011

A sweet family friend of ours, Mrs. Doris, was kind enough to share her grandmother’s Peanut Butter Fudge recipe. I’ve longed for a good peanut butter fudge recipe for years, and this one is it! It’s simple, creamy, and delicious…just what you want in a fudge recipe. I feel sure your guests would love a sample of this at your holiday gathering, don’t you? :)

Peanut Butter Fudge

3 cups granulated sugar

2 cups milk

1 cup creamy peanut butter

1 teaspoon vanilla

Butter a 9×13″ baking dish and set aside. Butter sides of a 5-quart saucepan. Add sugar and milk to saucepan; bring to a boil over medium heat, stirring constantly. Cook to soft ball stage (this can be done using a candy thermometer for measuring the temperature). Remove from heat and add peanut butter and vanilla. Stir until the mixture loses its gloss or until the peanut butter is completely melted. Pour mixture into prepared pan and allow to cool and set.

Overnight Cinnamon Rolls

Posted by Mandy on December 21st, 2011

Growing up, my family always went to my uncle’s house for breakfast on Christmas morning. It was one of my favorite times of the season, a time when we could go show off all of our new toys from Santa while enjoying time spent with family and diving into a delicious omelet made just to order for each person. We’d have Christmas Eve dinner at my Nana’s, Christmas morning breakfast at my uncle’s, lunch at my house, etc. Going from place to place like that back then was possible because I grew up in a small town where each place mentioned was, at most, five minutes from each other place. Although my family still celebrates Christmas morning each year at my uncle’s house I am no longer able to make it. With three kids and living 30 minutes away from my uncle’s house we just can’t ever seem to make it happen.

Since we don’t live close enough to family to be able to enjoy breakfast with them on Christmas morning, I decided a few years back that I needed to make our own Christmas breakfast tradition. We do our own family gathering Christmas morning where the kids open the gifts from me and the hubs so I decided with all of that going on our breakfast tradition needed to be something super simple that could be prepared and eaten relatively quickly. Sausage balls are a favorite of my kids, so naturally that was the first thing that I thought of. And then…another favorite, cinnamon rolls! What a delicious Christmas morning tradition to start, and to make things even easier you can roll them out the night before and just pull them out to rise and bake while you open gifts and they’ll be ready for you when you finish opening gifts. And think about it…who doesn’t love cinnamon rolls? Start your own family traditions with these delicious cinnamon rolls and your kids will have yet another reason to look forward to Christmas morning every year other than just the presents!


Overnight Cinnamon Rolls

For the dough:

4 large egg yolks, at room temperature*

1 large whole egg, at room temperature

1/4 cup sugar

6 tablespoon unsalted butter, melted

6 ounces buttermilk, at room temperature

4 cups all-purpose flour, plus additional for dusting

1 package instant dry yeast (approximately 2 1/4 teaspoons)**

1 1/4 teaspoons kosher salt

For the filling:

1 cup packed light brown sugar

1 tablespoon ground cinnamon

pinch salt

4 tablespoons butter, melted

For the icing:

4 tablespoons cream cheese, softened

3 tablespoons milk

1 1/2 cups powdered sugar

1/2 teaspoon vanilla extract

For the dough: In the bowl of stand mixer fitted with the whisk attachment, whisk the egg yolks, whole egg, sugar, butter, and buttermilk. Add approximately 2 cups of the flour along with the yeast and salt; whisk until moistened and combined. Remove the whisk attachment and replace with a dough hook. Add all but 3/4 cup of the remaining flour and knead on low speed for 5 minutes. Check the consistency of the dough, adding more flour if necessary (I usually add all the of the remaining flour); the dough should feel soft and moist but not sticky. Knead on low speed 5 minutes more or until the dough clears the sides of the bowl. Turn the dough out onto a lightly floured work surface; knead by hand about 30 seconds. Spray a large bowl with non-stick cooking spray.  Transfer the dough to the bowl, and spray the top of the dough lightly with non-stick cooking spray. Cover and allow dough to double in volume, usually 2 to 2 1/2 hours.

Prepare the filling by combining the brown sugar, cinnamon, and pinch salt in a small mixing bowl until combined. Set aside until ready to use.

Spray a 9×13″ glass baking dish with non-stick cooking spray. Turn the dough onto a lightly floured work surface. Gently shape the dough into a rectangle with the long side nearest you. Roll into an 18×12″ rectangle. Brush the dough with the melted butter, leaving a 1/2″ border along the top edge. Sprinkle the filling mixture over the dough, leaving a 3/4″ border along the top edge; gently press the filling into the dough. Beginning with the long edge nearest you, roll the dough into a tight cylinder. Firmly pinch the seam to seal the roll the cylinder seam side down. Very gently squeeze the cylinder to create even thickness. Using a serrated knife, slice the cylinder into 1 1/2″ rolls, yielding 12 rolls. Arrange rolls cut side down in the prepared baking dish. Cover tightly with plastic wrap and store in the refrigerator overnight or up to 16 hours.

The following morning, preheat the oven to the lowest setting that your oven allows (mine is 170 degrees F). Once it reaches temperature, turn the oven off and place the cinnamon roll pan into the warm oven. Allow the dough to rise until the rolls look slightly puffy, about 30 minutes. Remove the rolls from the oven and preheat the oven again to 350 degrees F. Return the pan of rolls to the oven and cook until golden brown, about 30 minutes.

While the rolls are cooling slightly, whisk the icing ingredients until creamy. Spread over the rolls and serve immediately.

*Note: To quickly bring eggs to room temperature, fill a bowl with hot water and place the eggs (still in the shell) in the water. Allow them to sit for about 5 minutes before removing from the water and using in the desired recipe.

**Note: Instant dry yeast is often labeled as “Rapid Rise” or “Bread Machine” yeast on the package so make sure you purchase these products and NOT active dry yeast. The active dry yeast will not rise as it should in this recipe.

Recipe adapted from: http://www.foodnetwork.com/recipes/alton-brown/overnight-cinnamon-rolls-recipe/index.html

Fran’s Sugar Cookies

Posted by Mandy on December 19th, 2011

This recipe is another one that goes way back. My sweet aunt, Fran, has been making these cookies for our family every year for Christmas for as long as I can remember. Fran is married to my mom’s brother, Buster, and they have lived away from home more often than not over the years. Even when they lived as far away as Saudi Arabia, I still remember Fran making these cookies and shipping them to us! What a special treat it always is to see them on the goodie table at Christmas time! Thankfully, Fran was kind enough to allow me to share this recipe with all of you. Thank you Fran for all of the memories made over the years with these yummy cookies in our kitchens!

These can be decorated a countless number of ways. You can simply sprinkle the colored sugars on top of the cookie dough itself, you can ice them (like I have done here, Fran recommends Pillsbury ready-made frosting), you can top them with a glaze made of powdered sugar and milk, or if you want to go all out you can make a royal icing to top them with. The possibilities are literally endless with these! I can’t think of a more perfect reason to get in the kitchen with little ones than making Santa a big plate pull of these!


Fran’s Sugar Cookies

2 cups all-purpose flour

1/2 teaspoon salt

1 1/2 teaspoons baking powder

1/2 cup margarine, melted

1 teaspoon vanilla extract

3/4 cup granulated sugar

2 eggs

In a medium bowl, mix flour, salt, and baking powder; stir and set aside. In a large bowl, mix margarine and vanilla, then add sugar and eggs. Pour dry mixture into wet mixture; stir until completely combined. Dough works best if chilled overnight. When rolling dough out, sprinkle with extra flour if it’s too sticky to work with. Roll dough and cut out with cookie cutters of your choice. Bake at 375 degrees F for 5-8 minutes. Cooking time will depend on the size of the cookies that you make. Cool cookies; add icing, sprinkles, and/or colored sugar. Enjoy!

Nutter Butter Balls

Posted by Mandy on December 19th, 2011

You remember the Oreo Truffles that I posted last year, right? If not, here’s the recipe again http://www.thesupermomchef.com/?p=405. Don’t even think about not making them because you will immediately fall head over heals in love with them. So, I was thinking what else I could mix up with some cream cheese, roll into a ball, and call them truffles. That’s when I thought about Nutter Butters! Peanut butter and chocolate is, after all, my absolutele favorite candy combination so why not, right? Give these a try if you like the Oreo ones from last year. Oh, and save yourself the dishes and do two batches at once. Trust me, you are gonna need them. I only made one batch the other day and mine were gone within two days.

Nutter Butter Balls

1 (1 lb) package Nutter Butter cookies

1 (8 oz) package cream cheese, softened

1 (16 oz) package chocolate almond bark coating

Prepare a sheet pan by lining it with waxed paper. Crumble cookies into fine crumbs using a food processor. Using a stand mixer fitted with the paddle attachment, mix together cream cheese and cookie crumbs until completely combined. Roll into 1″ balls. Refrigerate for 30 minutes, or until firm. Melt chocolate according to package directions. Dip each ball into the chocolate and place on the waxed paper. Return to refrigerator until set. Place balls into a tightly sealed container and store in refrigerator until serving time.

Peanut Brittle

Posted by Mandy on December 18th, 2011

Mmmmm…peanut brittle! The perfect combo of sweet and salty, wouldn’t you say? Peanut brittle always reminds me of my sweet Paw Paw (my mom’s dad). I grew up in Canton, Mississippi, where the Canton Flea Market happens each spring and fall. Each and every flea market, we’d head to the square with only one request from my Paw Paw, to bring him back some homemade peanut brittle. That same both that sold it back then still sells it today, but I tell you what…if I’d have known that it was this easy to make I’d have made it a lot more often for him. Since Paw Paw’s not here any longer to taste my new-found recipe for this, I shared it instead with my hubby. He gave this recipe his highest approval!

Peanut Brittle

1 cup granulated sugar

1/2 cup light corn syrup

1/4 teaspoon salt

1/4 cup water

1 cup peanuts

2 tablespoons butter, softened

1 teaspoon baking soda

Prepare a large sheet pan by lining it with foil; set aside. In a medium sauce pan set over medium-high heat, bring sugar, corn syrup, salt, and water to a boil. Stir until sugar is dissolved. Stir in peanuts. Set candy thermometer in place, and continue cooking. Stir frequently until temperature reaches 300 degrees F, or until a small amount of mixture dropped into very cold water separates into hard and brittle threads. Remove from heat; immediately stir in butter and baking soda; pour at once onto sheet pan. Spread into a rectangle and allow to cool. Break into pieces.

Recipe adapted from: http://allrecipes.com/recipe/moms-best-peanut-brittle/


Cheese Wafers

Posted by Mandy on December 16th, 2011

I thought maybe y’all were sick of sweet recipes and could use something different for a change. Don’t you go gettin’ too comfortable with the savory recipes though because tomorrow I have some more sweets to post for you. It is Christmas after all, the season of eating chocolate for breakfast and it being completely acceptable. 😉

Now on to the wafers. Those of you from the South with recognize these as a recipe somewhat like a cheese straw, except this dough is a bit thicker making it not appropriate for use in a cookie press. I have good news though…these are much easier to make because you don’t have to mess with that stupid cookie press thingy and have hand cramps by the time you finish. (I have a very high dislike for making cheese straws!) With this recipe, you make up the dough and then simply make small balls of dough, press ’em slightly with a fork, and bake! They are just as delicious to me as a cheese straw is, though my wacky hubby differs in that opinion, he prefers the thin crispness of a cheese straw over these. (Seriously, how did I ever end up married to a man that I am a polar opposite of?)

Oh, and one more thing to think about when preparing your holiday spread. These make a great addition to a party menu because it’s something salty/savory amidst all of the traditional candy sweets. (And at home, it gives you something to much on between the thousands of pieces of homemade candy…I can’t be the only one doing that these days, right?)


Cheese Wafers

1 1/2 cups margarine, softened

2 cups all-purpose flour

1/2 teaspoon salt

1/2 teaspoon ground cayenne pepper

2 cups grated Cheddar cheese

Preheat oven to 375 degrees F. Mix together dry ingredients, stir in Cheddar cheese to coat completely. Add butter and stir until completely combined. Shape into 1/2″-3/4″ balls, and place on a cookie sheet (do not spray with non-stick spray). Press each ball lightly with a fork to flatten. Bake until firm to the touch and golden. Immediately move wafers to a cooling rack to cool completely; store in an airtight container.


Cake Batter Truffles

Posted by Mandy on December 15th, 2011

How many times have you started out to make a cake and then by the time the batter is finished, you just can’t stop eating it so that there’s only a little cake left to bake when it’s actually time to put it in the oven? Please, dear heavens, tell me I’m not the only one who has done that before. I absolutely love cake batter, and even that’s the understatement of the year. Strangely enough, my husband thinks it’s disgusting. What a freak! Not necessarily the taste of the batter, but the raw eggs being in the batter that he can’t stand. He gets grossed out when I eat it and will walk right out of the room. And heaven forbid he ever find out that I allow our kids to eat it! He’d really go nuts on me if he knew that little secret! Thankfully, he doesn’t read this blog…at least not that I know of so none of you reading this tell him my secret, ok?

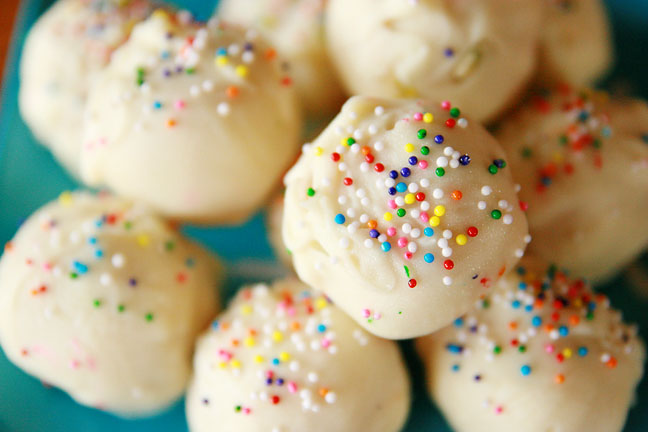
Sorry, I was blabbering there…back to the point. Cake Batter Truffles. I’ve seen numerous recipes for Cake Batter This or Cake Batter That (I even have a recipe for Cake Batter Ice Cream here on my blog) but it never tastes completely like the real stuff. Yes, it usually resembles the flavor of cake batter, but doesn’t completely taste just like it. Well then came these truffles. I’m not kidding  you when I tell you that they literally taste just like cake batter! These are super simple to make, absolutely delicious, and are so stinkin’ cute! I can totally see these on the table for each of my child’s future birthday parties. Just decorate for the appropriate party theme and you’re set. I actually had the intentions of covering these truffles I made in Christmas sprinkles but realized after I got everything out to make them that I was out. I think my munchkins snuck in there and ate them all! Oh well…these are just as delicious even if they don’t look festive for the holidays.


Cake Batter Truffles

For the filling:

1 1/2 cups all-purpose flour

1 cup yellow cake mix (I used white because I already had some opened)

1/2 cup unsalted butter, softened

1/2 cup granulated sugar

1 teaspoon vanilla extract

1/8 teaspoon salt

3-4 tablespoons milk

2 tablespoons sprinkles

For the truffle coating:

1 (16 oz) package white almond bark (or white candy melts)

4 tablespoons yellow cake mix

sprinkles

Beat together butter and sugar using an electric mixer until combined. Add cake mix, flour, salt, and vanilla and mix thoroughly. Add 3 tablespoons of milk, or more if needed, to make a dough consistency. Mix in sprinkles by hand. Roll dough into 1″ balls and place on a wax paper-lined cookie sheet. Chill balls in the refrigerator for 15 minutes to firm up.

While dough balls are chilling, melt almond bark in the microwave according to package directions. Once melted, quickly stir in cake mix until incorporated completely. Using a fork, dip truffles into almond bark and shake off excess bark by tapping the bottom of the fork on the side of your bowl. Place truffle back on the cookie sheet and top with sprinkles. Repeat with remaining balls until finished. Chill cake batter truffles in the refrigerator until serving. Makes about 24-30 truffles.

Recipe from: http://www.the-girl-who-ate-everything.com/2011/03/cake-batter-truffles.html


Mae Mae’s Christmas Ambrosia

Posted by Mandy on December 14th, 2011

This is another one of those recipes that floods me with memories of my sweet grandmother, Mae Mae. When thinking of Mae Mae and the many things she always made at Christmas time, you can’t leave this recipe out. I remember boxes of fruit being at her house, but I don’t remember where they came from (whether she purchased them or they were gifts). She’d always use those boxes to make tons of this Ambrosia at Christmas. The funny thing is that I never ate Ambrosia growing up, but I absolutely love it now. Just sweet enough to finish off a meal but not too sweet, if that makes sense.

Ambrosia is one of those recipes that can be adapted to suit your own tastes easily. If you don’t like one of the ingredients, leave it out or substitute something that you do like. It’s totally up to you! I, for one, can’t stand coconut (think back…you’ve never seen me post a recipe with coconut in it, have you?) but it doesn’t bother me at all in Ambrosia. Strangely enough, I actually like Ambrosia with the addition of the coconut.

I was lucky enough to have my mom make me some this year and send it to me via my brother but trust me when I say that this is one of those anyone-can-make-it type recipes. It’s also a great addition to the Christmas spread for those that don’t like the idea of a congealed salad on their plate. Just put small fruit bowls on the table and people can fill it to the brim with this and eat it alongside the other yummy dishes that day!

Mae Mae’s Christmas Ambrosia

8 oranges, peeled and segmented

1 large can crushed pineapple

1 bag of frozen coconut, optional

2-3 apples, peeled and cubed

1 large can pineapple juice

sugar, to taste

Mix togehter apples, orange, crushed pineapple, coconut, and half of the pineapple juice. Stir all together to combine well. Add sugar, to taste. Store in the refrigerator until ready to serve.


Toffee Bars

Posted by Mandy on December 13th, 2011

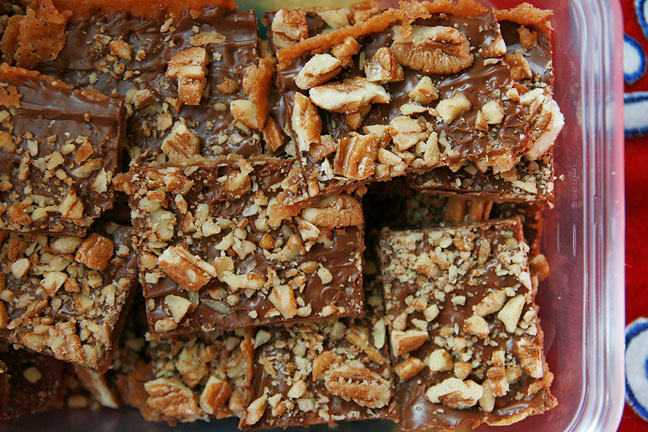
We all think of toffee when we think of Christmas, don’t we? It’s one of those things we don’t think about much at all, but then when Christmas rolls around everyone pulls out their family’s favorite toffee recipe. Well, this is my Nana’s. I’m sure a friend gave her the recipe who received it from another friend. You know how that goes, but I’m sure she’s been making it for years and years. This is the first year I’ve made it for my family and I ended up taking it to a couple of gatherings I’ve been as well this year. It has not gotten a bad review yet, so here’s hoping you like it as much as we all do!

Toffee Bars

2 sticks butter, softened

1 cup light brown sugar

1 egg yolk, lightly beaten

1 cup flour

1/4 teaspoon salt

1 teaspoon vanilla

6 Hershey bars (milk or dark chocolate, your choice)

chopped pecans

Preheat oven to 350 degrees F. Cream butter and sugar. Add egg yolk, flour, salt, and vanilla. Cream well and spread evenly into a 9×15″ pan. Bake for 20 minutes; remove from oven and immediately spread Hershey bars over the top. Sprinkle chopped pecans over chocolate. Chill until hard enough to cut into squares.


Tiger Butter

Posted by Mandy on December 12th, 2011

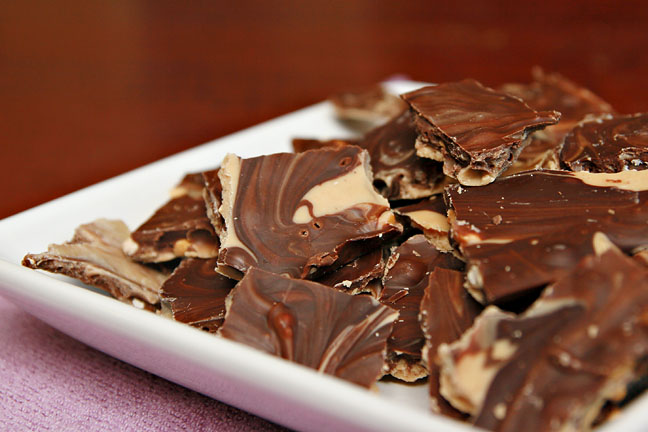
I have no idea where this recipe originated since we’ve been making it every Christmas for as long as I can remember, but I would love to personally thank whoever came up with it. As you all know, I’m a bit of a peanut butter and chocolate addict. You put the two of those things together and I am sure to love whatever it is. This treat is no exception. In fact, it’s so good that I only allow myself to make it one time of year, at Christmas. Truth be told, I took this photo last year but never had the chance to blog it before Christmas passed. I haven’t posted it since because I didn’t want it to get lost in the posts and then forgotten about when Christmas rolled around this year. So here ‘ya go, do yourself a favor and make some of this ASAP!


Tiger Butter

1 (16 oz) package white chocolate chips

1 (16 oz) package semi-sweet chocolate chips

1 (12 oz) jar crunchy peanut butter

Prepare a sheet pan by lining it with waxed paper; set aside. In a double boiler, melt white chocolate and peanut butter until creamy. Pour peanut butter/white chocolate mixture onto the waxed paper. Melt chocolate chips in the double boiler; pour over peanut butter mixture. Run a knife through mixture to swirl the mixtures together; refrigerate until set. Break into pieces.