Summer Couscous Salad

Posted by Mandy on August 28th, 2012

What is couscous, you ask? To be completely honest, I’m not all that sure. I know it’s a grain, and a very healthy one at that. It’s commonly used in middle-eastern cooking if I’m correct. But the bottom line is, it’s practically one of the easiest things you can make, and it’s absolutely delicious. So that’s pretty much all you need to know.

I’ve heard about couscous for years but have never actually thought to throw any into my basket at the grocery store. I’m sorry now that I’ve waited so long! It’s so easy to flavor however you choose (sub different flavor broths for the water, change the flavors of the vinagrette, add different veggies). The possibilities are endless! I must say that I was even surprised with the flavor of the couscous before I made it into a salad. Just the couscous with the broth for flavor/cooking was superb!

So please don’t wait any longer. Give couscous a try and you won’t be sorry!


Summer Couscous Salad

2 cups chicken broth

1 1/2 cups whole wheat couscous, uncooked

1/4 cup extra virgin olive oil

1/3 cups red wine vinegar

1/4 teaspoon crushed red pepper flakes

1/2 teaspoon salt

1/2 teaspoon paprika

1/8 teaspoon black pepper

6 green onions, white and green parts, chopped

1 tablespoon dried basil

1 pint cherry tomatoes, halved (I used one large tomato, peeled, seeded, and diced)

zest of 1 lemon

1 cup feta cheese

sliced Kalamata olives

In a medium saucepan, bring the broth to a boil. Stir in the couscous. Cover the pan, remove from the heat and let stand for five minutes. Transfer the couscous to a large bowl and fluff with a fork. Allow the couscous to cool to room temperature.

In a small bowl or liquid measuring cup, whisk together the olive oil, vinegar, red pepper, salt, paprika, and pepper. Set aside.

Add the chopped green onions, basil, tomatoes, lemon zest, Kalamata olives and feta cheese to the cooled couscous and toss. Pour the vinaigrette over the salad and stir or toss until combined. Serve chilled or at room temperature.

Adapted from: http://www.melskitchencafe.com/2012/08/summer-couscous-salad.html

Pizza Quesadillas

Posted by Mandy on August 24th, 2012

You know what I hate? When I ask my family what they want for lunch or dinner and they reply, “What do we have?” We don’t keep that many convience foods around (ie frozen meals, etc.) because I’d much rather take 5 minutes to make my own panini or pasta than throw a frozen meal in the microwave. But of the few of those items we do keep around, they are always the same few items (ramen noodles, canned soup, etc.) Therefore, there’s absolutely no reason to ask the same question every single time because my answer is always the same. And quite frankly, I get sick of answering the same question every single time. So the other day when this same thing happened, I really made my hubby mad.

The conversation went as normal, at least for a short while…

Me: “What do you want for lunch?”

Hubby: “What do we have?”

Me (standing in front of the pantry door fuming): “Ohhhhh, you know what would be good? What if I took these tortillas and made you a quesadilla out of them but instead of using Mexican fillings I used pepperonis, onions, peppers, black olives, and shredded Mozzarella cheese? Then instead of dipping in sour cream or salsa we dipped them in pizza sauce?”

Hubby: “Oh, yeah, that sounds really good! Why don’t you make me that?”

Me: “Because I don’t have the ingredients other than tortillas and pizza sauce.”

Hubby (now fuming): “Then why did you mention it?”

Me: “So you’d be as mad as me and stop asking me the same friggin’ question every time I ask you what you want to eat!”

Thankfully hubby learned his lesson and now only jokingly says, “What do we have?” when I ask him what he wants for a meal. It only took 10 years to teach him that. Maybe there’s hope that he’ll eventually learn to refill the Q-tip container when he grabs the last one too.

And before any of you out there think I’m a mean person for telling him about something that I didn’t ever make for him, you are wrong. I’ve since made these quesadillas probably a dozen times, in less than two weeks. My family likes them that much. Even my three year old loves them and that, my friends, is a HUGE compliment because she likes nothing other than chocolate these days.

Pizza Quesadillas

Tortillas

shredded mozzarella cheese

pizza toppings, as desired (pepperoni, sausage, peppers, onions, black olives, etc.)

Preheat a large griddle over medium-high heat. Rub with a stick of butter, just to coat. Place the tortilla on the griddle flat, so that the entire tortilla is touching the pan. Top with shredded cheese and desired toppings. Allow the cheese to melt slightly before folding in half. Grill until both sides are golden brown, the cheese is melted, and the toppings are warmed through. Cut into wedges and serve with warm pizza sauce.

Recipe adapted from: http://www.the-girl-who-ate-everything.com/2012/07/pizza-quesadillas.html

Kat’s Artichoke & Roasted Red Pepper Dip

Posted by Mandy on August 22nd, 2012

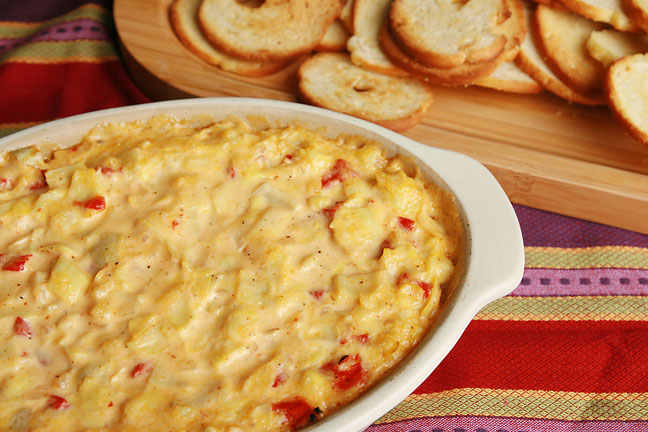
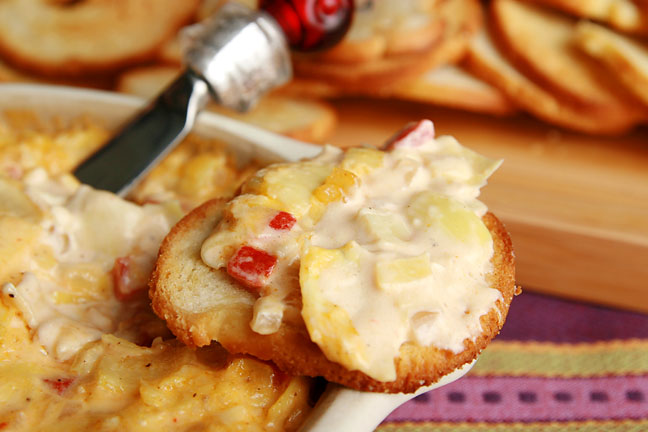
For months my sister raved about this dip that her friend made and that they munched on during one of their porch talks. And believe it or not, she had the nerve to talk about it over and over and not bring me the recipe. Seriously? What kind of person tells me, The Supermom Chef, about how good a recipe was and doesn’t share the recipe? The only reason why I’m now able to call her my sister again after behaving so terribly to me, her beloved sister, is because she redeemed herself and finally asked Kat, her best friend, for the recipe. And I made it the very next day for company that came over and we all gorged ourselves on this yummy dip (although I did make a couple of slight changes to her recipe). Even my kids, the kids who if they had even an inkling of what was in the dip would most certainly put it nowhere even close to their lips. So, do yourself a favor and have folks over to your house soon and make this for them. Trust me, you don’t wanna make this alone. You’ll most likely eat the entire dish. Not that I’m speaking from experience or anything. *ahem*

P.S. You should have seen the looks I got from my neighbors driving down the street as I sat outside photographing this dip. It was dark already so I had to pull out my big studio light. I’m sure they thought I was nuts. See what I go through for you folks to see these photos! :)


Kat’s Artichoke & Roasted Red Pepper Dip

1 (14 oz) can artichoke hearts (in water), drained & chopped

1 (7 oz) jar roasted red peppers, drained & chopped

1 cup mayonnaise

1/2 cup sliced green onions

1 cup grated Parmesan cheese

1/2 lemon, juiced

salt & freshly ground black pepper, to taste

Preheat oven to 350 degrees F. Saute the green onions (or yellow onion, if desired) in a small amount of olive oil until softened. Mix all ingredients together until well combined. Pour into a small baking dish and bake until golden and bubbly, about 20 minutes. Serve hot with your choice of dippers (bagel chips were great with it!)

Easy Caramel Brownies

Posted by Mandy on August 21st, 2012

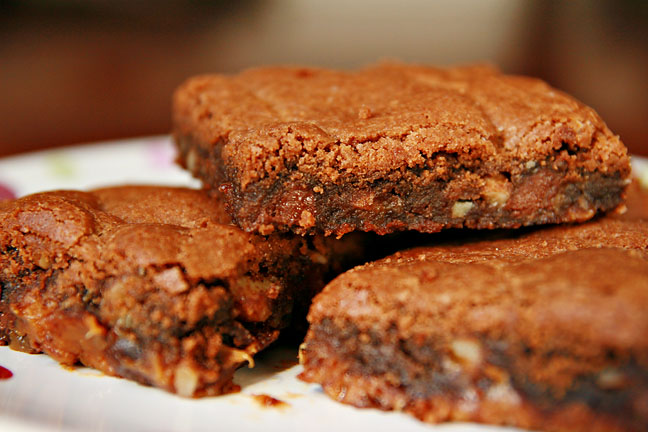
There are about a million different recipes out there for these brownies. This recipe has been around for as long as I can remember. You can choose any one of your favorite community cookbooks around here and you’re sure to find some version of it. And there’s a reason for that…because they are just that dang good! The day that I made these my hubby came home and as soon as he walked in the door he saw the pan of brownies sitting on the kitchen counter. I immediately started filling him in on all the goings-on of the day, how the kids drove me crazy, how I was at my whits end, etc. During the middle of me talking, he takes his first bite, and puts his hand up in my face and says, “Mmmmmmm, just let me enjoy this for a second.” Yep, I was basically told to shut the heck up so he could fully appreciate the deliciousness of his caramel brownie.

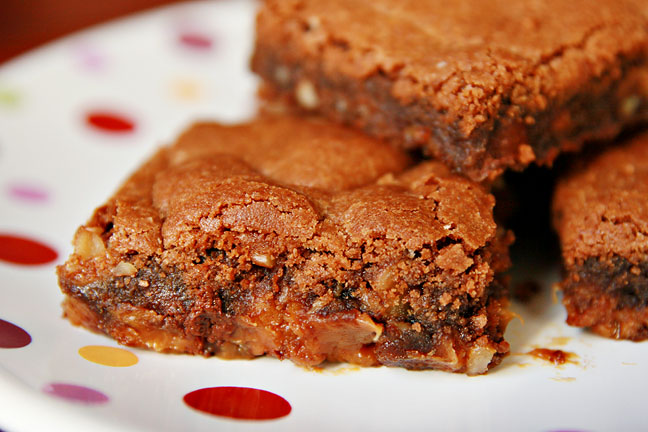
Now I know the recipe title has the word “easy” in it. And the reason that I can call them that is that I’ve done all of the hard work for you. Most of the recipes floating around call for you to divide the brownie mixture in half and spread half on the bottom of a 9×13″ dish, pour the caramel over the bottom layer, and then top with the other half of the brownie mixture. I tried this route about 6 different times, and although the product that came out of the oven was utterly delicious, the caramel always sank to the bottom of the pan and stuck. So then I tried foil in the pan first. All that did was make the caramel stick to the foil so that I had to pick tiny pieces of foil out of the caramel before I could eat it. Can you imagine cleaning up hardened caramel from a dish? Yeah, not fun. Not fun at all. So this time I decided I’d use about 2/3 of the brownie mixture spread on the bottom of the dish, and then pour the caramel over, while crumbling the remaining brownie batter (or really it’s more like a dough because it’s so thick) over the caramel. Sure, the caramel isn’t completely covered on the top but I promise you it’s so much easier this way. Just trust me, don’t go through half a dozen boxes of cake mix and bags of caramel before you figure it out.

Oh, and one more thing to mention, the photo pictured is one of the batches that stuck. They look pretty but it was as hard to get it out of the pan as it is for me to get my kids to eat broccoli (and that’s impossible!) Let’s just say that the pan that was successful was so good it didn’t last long enough to take photos of and leave it at that. :)


Easy Caramel Brownies

1 box German chocolate cake mix

1 cup finely chopped pecans

1/3 cup evaporated milk

1/2 cup (additional) evaporated milk

1/2 cup butter, melted

60 whole caramels, unwrapped (I prefer Kraft)

1/2 cup semi-sweet chocolate chips

Preheat oven to 350 degrees F. In a large bowl, mix together cake mix, chopped pecans, 1/3 cup evaporated milk, and melted butter. Stir together until totally combined. Mixture will be very thick. Press two thirds of the mixture into a well-greased 9×13″ baking dish. Bake for 8 to 10 minutes. Remove pan from oven and set aside. In a double boiler (or a heatproof bowl set over a saucepan of boiling water) melt caramels with additional 1/2 cup evaporated milk. When melted and combined, pour over brownie base. Sprinkle chocolate chips evenly over the caramel. Top with crumbles of the remaining brownie batter/dough. Bake for 20 to 25 minutes. Remove from pan and allow to cool to room temperature before serving.

Adapted from: http://thepioneerwoman.com/cooking/2011/05/knock-you-naked-brownies/

Strawberry Cobbler

Posted by Mandy on August 17th, 2012

I don’t know about where you are, but it’s pouring down rain here. Yucky, nasty, dreary day. Perfect day to stay inside and try out a bunch of new recipes! Not that I’ll have that luxury but a girl can dream, right? :)

The other day I was at the store and they had strawberries on sale. Strawberries are one of those things that I absolutley love but only buy when they are on sale because they are quite expensive at times. I absolutely love them! So when I found them on sale I decided that instead of just washing them and eating them I’d actually use them to make something this time.

My grandmother used to make this super simple cobbler out of fresh peaches every summer. She’d just stew them for a little while with some sugar to make a sweet sauce, and then bake them with flour, sugar, and butter. Easy peasy! So I thought, “Why not try that same recipe with these strawberries?” Boy am I glad that I did because this was absolutely delicious! This one’s going to be made many times in the future for sure!


Strawberry Cobbler

2 pounds fresh strawberries

1 1/2 cups self-rising flour

1 1/2 cups milk

1 1/2 sticks butter

2 cups sugar, divided

Remove the stem from the berries and cut each strawberry into quarters. Pour into a large bowl and sprinkle 1/2 cup sugar over the strawberries, stirring to cover all. Allow to sit on the countertop for about 30 minutes, stirring every few minutes, as strawberries macerate.

Preheat oven to 350 degrees F. While the oven is preheating, place the butter in a 9×13″ baking dish and place in the oven to melt while you prepare the other ingredients. Stir together the flour, milk, and remaining sugar. Pour into the baking dish with the butter, pouring evenly around the dish but being careful not to stir the mixture. Top evenly with the macerated strawberries. Bake until the top crust (which will rise to the top) is golden brown.

Chicken Burrito

Posted by Mandy on August 13th, 2012

I know, I know, it’s been far too long. I won’t go into detail, but we’ve been dealing with some tough issues around our house (and no, we are NOT having marital problems…just making that clear before the rumor gets started). Though I didn’t anticipate it happening, the blog suffered because of this and for that, I apologize. I can’t promise that I will be posting a whole lot in the upcoming few weeks and months but I promise I will do my best. In the meantime, please be patient with me and continue follow along with my recipes if you’d like.

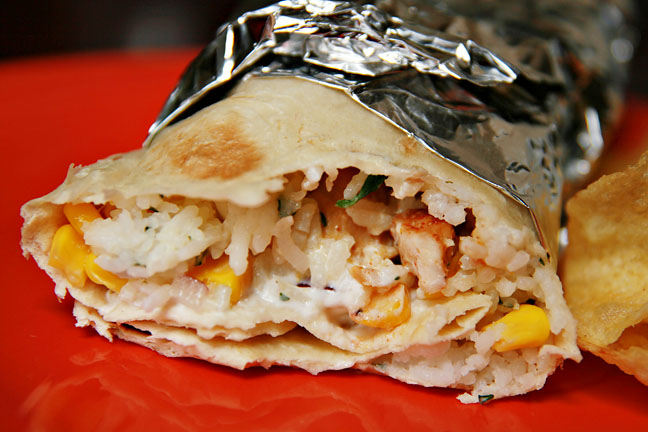
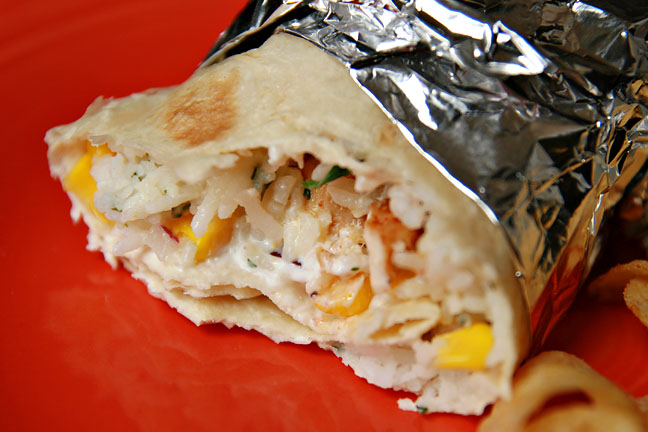
Now onto the long awaited burrito recipe. I’ve told you of my love for the restaurant Chipotle on previous posts. I long for their burritos so bad, but unfortunately only ever get to indulge in one on our trips up to Boston for my son’s surgeries. So my momma always taught me to “make-do” and “make-do” I do by preparing a homemade burrito similar to the yummy one at their restaurant. Now I won’t go so far as to call this a copycat recipe, because it’s certainly not. I simply make a couple of the different components that I like in my burrito from Chipotle, and go from there.

If you are a stay-at-home mom, this is a great recipe to have on hand for quick dinners. My favorite thing to do is to make all of the separate components (rice, corn salsa, chicken) on a Monday and simply reheat the components that need it every day for lunch until I run out. It’s cheap, delicious, and quick. You can’t beat that!

Chicken Burritos

1 recipe Almost Famous Corn Salsa (http://www.thesupermomchef.com/?p=1331)

1 recipe Cilantro Lime Rice (http://www.thesupermomchef.com/?p=1336)

burrito size flour tortillas

2-3 chicken breasts

salt, to taste

chipotle chili pepper, to taste

olive oil

assorted burrito fillings, as desired (ie sour cream, salsa, shredded cheese, guacamole)

Place a large skillet over medium-high heat. Rinse chicken and cut off all remaining skin and/or fat. Cut into small cubes; dry thoroughy. Sprinkle with salt and chipotle chili powder. Be careful adding the chili powder as it’s very spicy. Start by adding a small amount to the raw chicken and, if after cooking, you’d like yours spicier add more. Add a teaspoon of olive oil to the hot skillet, and allow olive to warm through; add chicken cubes. Continue to cook over medium-high heat until cooked through, stirring several times. Remove from heat and set aside. Warm burrito as desired. Top with rice, corn salsa, chicken, and other desired fillings. Roll up, burrito style, and wrap in foil (this makes it easier to hold together while you are eating). Serve immediately.

Cilantro Lime Rice

Posted by Mandy on May 24th, 2012

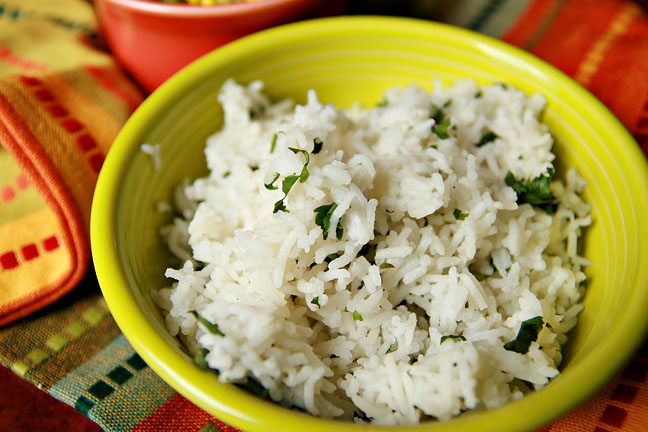
It’s been a whopping 20 days but I am finally getting around to posting the recipe for the rice to go along with the Almost Famous Corn Salsa (http://www.thesupermomchef.com/?p=1331). You don’t want to miss out on this stuff either! This corn salsa and the cilantro lime rice are two of the components to go along with my copycat burrito I’ll be posting soon. Stay tuned for that one! In the meantime, make some of this to serve alongside of that salsa. You won’t be sorry!


Cilantro Lime Rice

1 cup Basmati rice*, prepared as you prefer

1-2 limes, juiced

salt, to taste

3 tablespoons chopped fresh Cilantro

1 tablespoon butter

Mix all ingredients together until cilantro and lime juice is equally distributed throughout rice. Serve warm with burrito fixings, as prefered.

*Note: You can use regular white rice for this recipe, but to me the Basmati rice seems to taste better in this recipe. I cook my rice in my rice cooker for the best texture.

Almost Famous Corn Salsa (Chipotle)

Posted by Mandy on May 4th, 2012

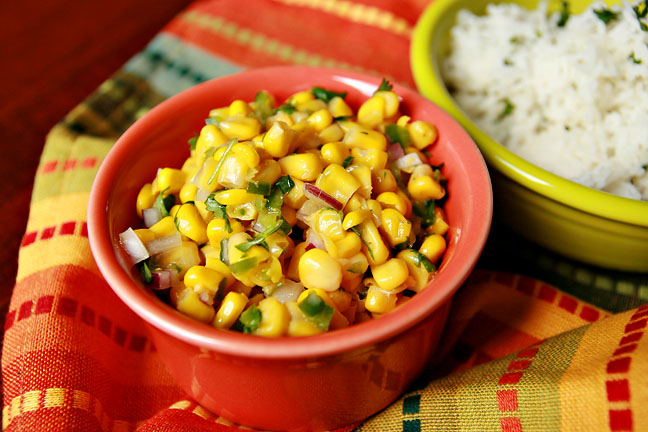
I think that I have shared with you all before about my son’s illness, and how we regularly travel from Mississippi to Boston for his many medical procedures. Well, let me just tell you that spending time in the hospital the entire we’re up there doesn’t leave time for much fun. But let me also tell you that you shouldn’t feel sorry for me while I’m there. Know why? Because it’s guaranteed that I will get to enjoy my favorite burrito from Chipotle at least a handful of times while I am there (except our last trip, during which time I almost didn’t get one at all but scarfed one down for dinner our last night despite the fact that I was not even the least bit hungry). Seriously, I crave these things ALL THE TIME! They are that good! You can have your taco bell and I’ll live happily here on out with my Chipotle, thankyouverymuch!

So far, despite my pleading and begging to the big dogs at Chipotle, I haven’t been able to persuad them to open one here. So until I’m able to convice them, making my own substitute will just have to do. *sigh*

Luckily, the work of recreating their delicious corn salsa (one of the different selections among many that you can choose to top your burrito/bowl) has already been done for me by the staff at Food Network. Imagine my surprise when I opened the newest copy of Food Network magazine and found their “Almost Famous” recreation of the ever-popular salsa. You can bet I immediately made it too! Of course, that was months ago and I’m just now getting around to sharing the recipe with you all. But whatever…don’t hate me! :) What better excuse than Cinco de Mayo!


Almost Famous Corn Salsa (Chipotle)

1 jalapeno pepper, seeded and chopped

3 teaspoons extra virgin olive oil

kosher salt, to taste

1 can whole kernel corn, drained

2 tablespoons chopped fresh cilantro

2 tablespoons chopped red onion

2 tablespoons fresh lime juice

1/2 teaspoon sugar

Mix all ingredients together, stirring to combine. Season with salt, to taste. Serve with corn chips or on/with your favorite tex-mex dish.
 
Recipe adapted from: http://www.foodnetwork.com/recipes/food-network-kitchens/almost-famous-corn-salsa-recipe/index.html

Caramel Apple Dip

Posted by Mandy on April 24th, 2012

There are some people out there that always mention this blog and how much they use it every time they see me. A sweet friend of mine, Leslie, is one of those people. She always makes it a point to tell me how useful she finds the site and how many times she uses my recipes. Comments like that make my day! So much work goes into writing this blog, shopping for and preparing ingredients, making the goodies, photographing the goodies, post-processing the photos, writing and posting the updates. It’s a labor of love for sure, but as long as I know folks are finding the site useful I have promised to keep up the extra work. Thank you, Leslie for always being so kind about the site. I hope some others of you out there are finding the site as useful as Leslie says she does. :)

Now, onto Leslie’s delicious recipe she shared with me. CARAMEL. APPLE. DIP. Need I say more? Who doesn’t love caramel apples? And who doesn’t love cream cheese, powdered sugar, and vanilla? Nobody that I know of (and if you don’t like them, don’t tell me because I’ll judge you right then and there). I made this dip a couple months ago for a gathering for my daughter’s birthday and everyone went crazy over it! It was gone within minutes and I wished I had doubled the recipe because everyone kept asking for more. This one is sure to please!

P.S. Forgot to mention…the instructions that Leslie gave me were taken down quickly in the notes app on my phone during passing at the local Chinese restaurant. I didn’t do a very good job of writing it all down so these may not be her exact instructions but you can’t mess it up. If all else fails, mix it all together and serve it in a bowl like I did. :)


Caramel Apple Dip

2 (8 oz) blocks cream cheese, softened

1 1/2 cups powdered sugar

1 teaspoon vanilla

chopped pecans, however much you desire

*sliced granny smith apples

1 container Marietta’s caramel dip (found in the produce section of most supermarkets)

Mix together cream cheese, vanilla, and powdered sugar until well combined. Wrap in plastic wrap and roll into a ball; refrigerate until firm. Place into a large bowl and mold the ball to fit the bowl, pressing out a bowl-shaped hole in the middle of the cream cheese mixture. Pour the caramel into the hole (you may not need the entire package); sprinkle generously with chopped pecans. Serve with sliced apples for dipping.

Please note that in the photo above I did not assemble my dip in the way mentioned in the recipe. I simple put the cream cheese mixture into the bottom of a bowl, poured a generous layer of caramel over the mixture and spread evenly, then topped with chopped pecans.

*Note: I use a product called “Fruit Fresh” to keep my apples from browning before serving. Just sprinkle a little over them in a plastic bag and shake to coat.

Ranch Dressing

Posted by Mandy on March 29th, 2012

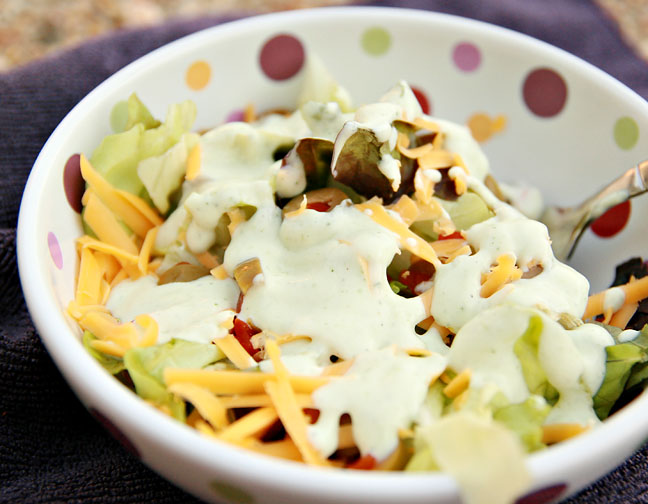
There just are no words to describe my love for ranch dressing. I have always liked it, but my obsession with it started back in school when my best friend suggested I dip my french fries in it. At first it sounded awful, but needless to say, I was immediately hooked. Then I began putting it on everything – pizza, burgers, pasta (ranch pasta salad? YUM!), basically anything that you can imagine.

Strangely enough, I now find it absolutely delicious to put ranch dressing on salad. Say what? Yep, I now love salads (wouldn’t touch the stuff back in the day) and can’t get enough of them so this ranch hits the spot on the days when I’m craving some yummy “rabbit food,” as my brother calls it. I have served this dressing on several occassions to company when we have people over for dinner, and I might add that on one occassion the company woke up the next morning and had the leftover shrimp dipped in this dressing for breakfast. It’s that good, folks!


Ranch Dressing

3/4 cup mayonnaise

3/4 cup sour cream

1 tablespoon olive oil

1 tablespoon lemon juice

1 cup buttermilk

1 small bunch chives

small handful fresh parsley

1 clove garlic, chopped or minced

1/2 teaspoon kosher salt

freshly ground black pepper

Combine all ingredients in a blender or food processor and blend for 10 seconds. Taste and adjust seasonings as desired. Blend again until completely combined; store in an airtight container in the refrigerator until ready to serve.

Recipe very lightly adapted from: http://annies-eats.com/2010/07/08/ranch-dressing/